The calendar slicer is a specialized slicer for date-time columns coming from a SQL database, especially where the classic date-time data groups (quarter, semester, year, month, week) don't exist. The slicer enables you to filter the query by these groups, without the need to construct any complex formulations. This is an excellent solution for users who are directly querying a SQL database and cannot manipulate the database and don't want to spend time creating the relevant formulations.
Calendar Slicer Types
Pyramid data modeling enables users to construct these hierarchical date-time groups when designing the ETL and then add those elements to the query in Discover. However, this solution is only relevant to those users who construct the model in Pyramid; many users query the database directly. In a direct querying scenario, the user may want to add years to the query, while the database only contains a flat date-time hierarchy consisting of date keys. How can this user add 'years' to the query?
Pyramid offers two solutions for this requirement:
- On-the-fly "date part" calculations. Date part calculations produce custom columns which can be added to any part of the query.
- Date Calendars. The Date Calendar is used to filter the query by specified dates or time periods, date ranges, date formulations, and date functions. From the calendar slicer, the user selects the required dates or time period, and the query is filtered "on-the-fly," without creating any custom columns.
Note: Calendar slicers are supported only for SQL models. This functionality is not currently supported for MS OLAP, Tabular, or SAP BW.
Creating a Calendar Slicer
Drag the date-time hierarchy (yellow highlight below) onto the Filters drop zone and drop it onto the Date Calendar sub-menu (purple highlight). Hovering over the Filters menu opens the sub-options:
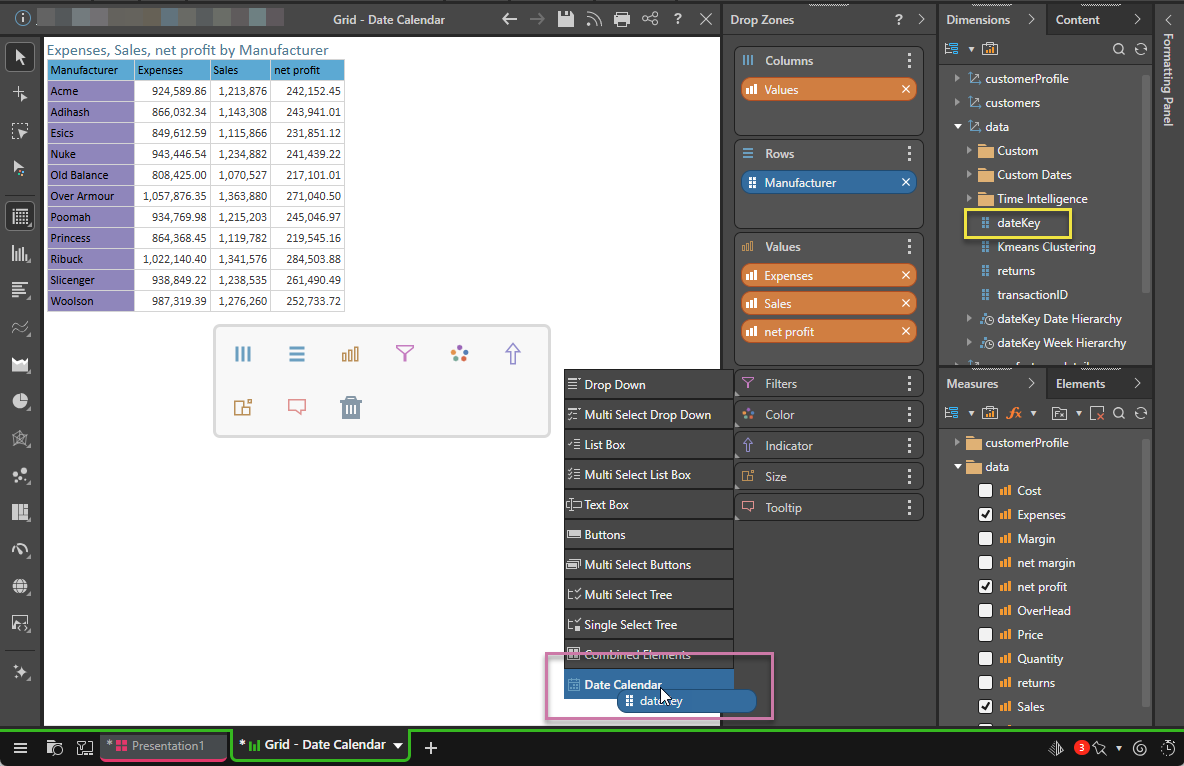
Note: A Date Calendar can only be created using a date-time column.
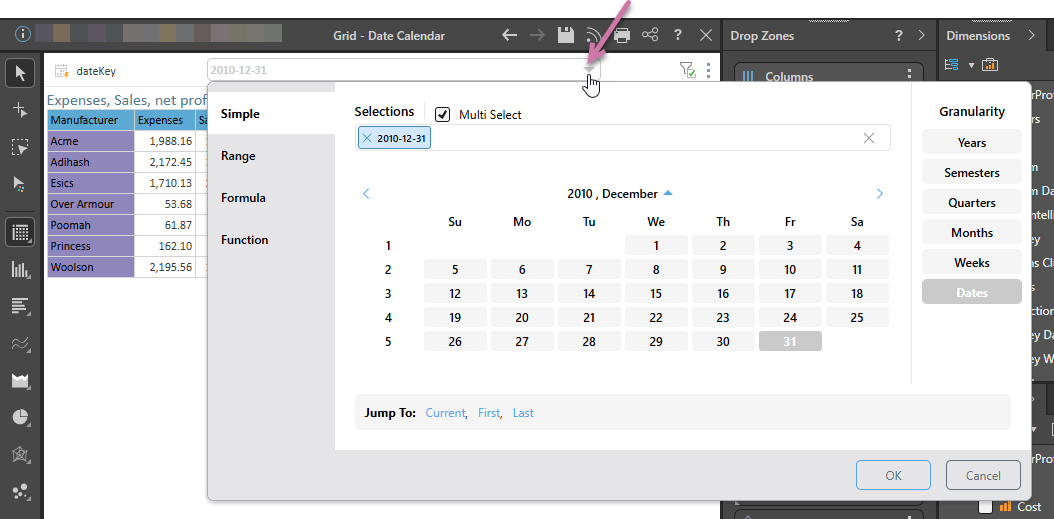
This adds a Date Calendar slicer to the canvas. When you click the slicer's drop-down (purple arrow below), the Date Calendar opens instead of a list of drop-down options. Continue reading to learn how to navigate the Date Calendar.
Using the Date Calendar
Calendar Type
The calendar slicer features different "Pickers," each designed to meet a different set of user requirements:
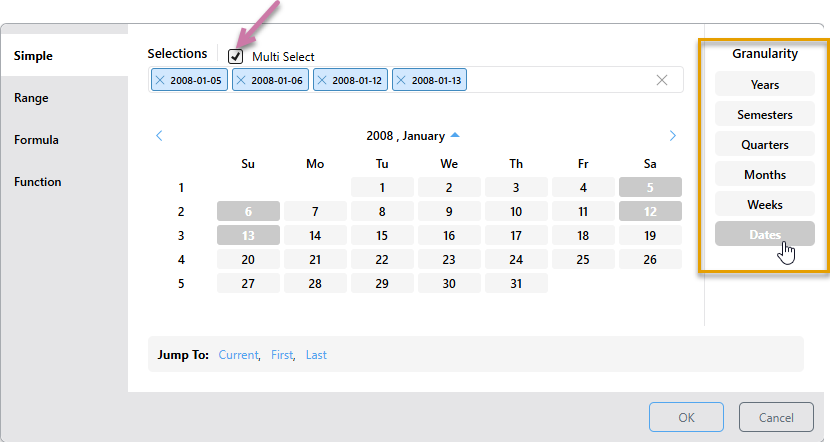
The Simple Picker allows you to select the items that should be used to filter the query. To select more than one element, select the Multi Select checkbox (purple arrow below). With Multi Select enabled, you can select multiple elements from any level of granularity (orange highlight).
The example below filters the query by the four dates selected: 5, 6, 12, and 13 January, 2008:
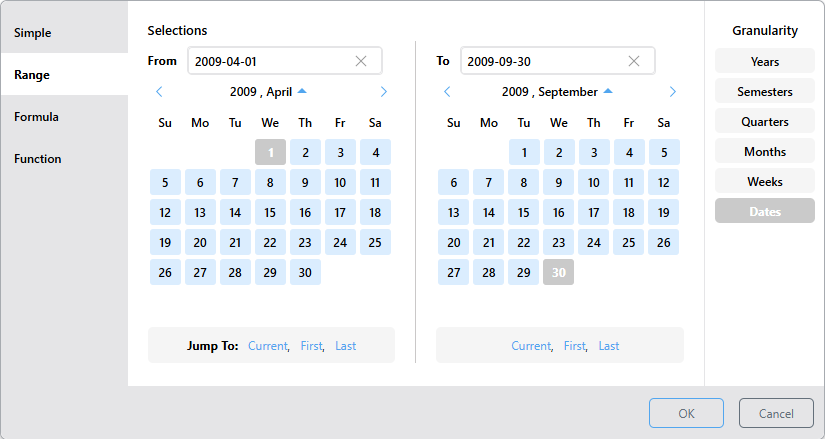
Use the range picker to filter the query by a date range, beginning with the From date, up to and including the To date. Select the required level of granularity, then select the start date from the left, and the end date from the right.
The example below filters the query by all dates between 1 April 2009 and 30 September 2009, inclusive:
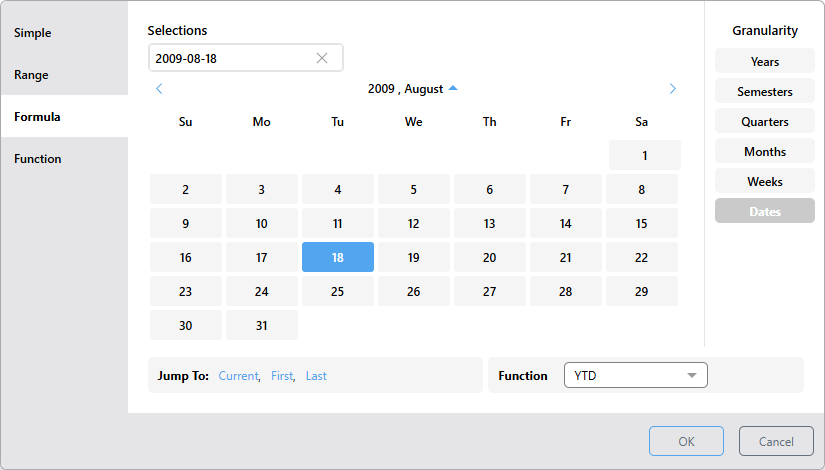
Filter the query by a formula based on the selected date element. Start by selecting the granularity level, then select the date element, then choose the required function. (Which functions are available depends on the selected level of granularity.)
The example below filters the query by all dates in 2009 (YTD), up to and including 18 August:
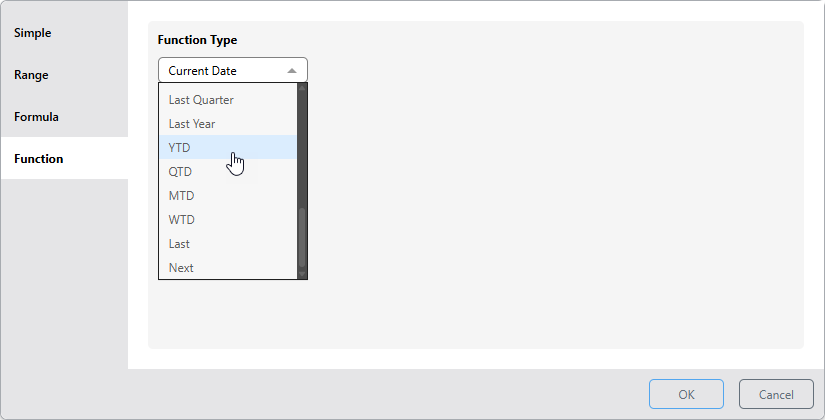
Filter the query dynamically using a date function that references the "latest date." Which date is the latest, depends on your model:
- If your model includes dates up to and including the current date, then the latest date is today.
- If your model includes dates from the past, then the latest date is the latest date that we have data for. If we have data from 2010 only, then the latest date is in 2010.
- If your model includes future dates, then the latest date is the last of the future dates. If we have data to 2050, then the latest date we have data for is in 2050.
The example below (YTD) filters the query by the year to date. This means that, if the latest date you have data for is today, Pyramid will select the data for this year up to and including today:
Granularity
Rather than displaying dates only, the Date Calendar allows you to specify the desired level of Granularity (orange highlight below). This means that you can choose to display any of the date-time groups in the calendar and make your selections accordingly:
- Select Years and then select 2010 to filter the query to display data for 2010.
- Select Semesters and then select 2008 > S2 and 2009 > S2 to filter the query by semester 2 of 2008 and 2009.
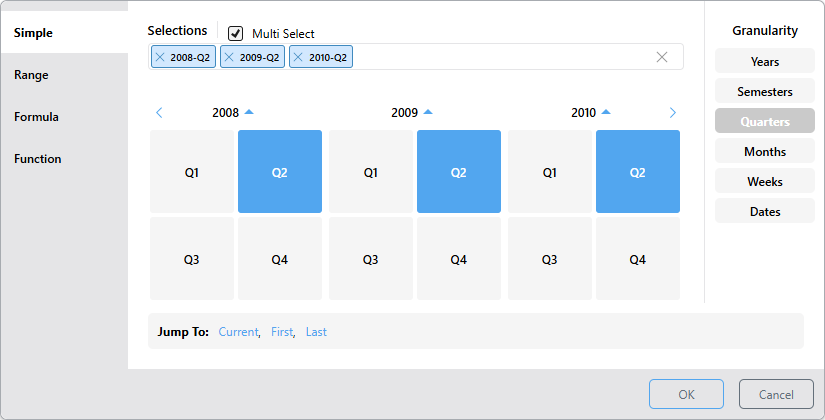
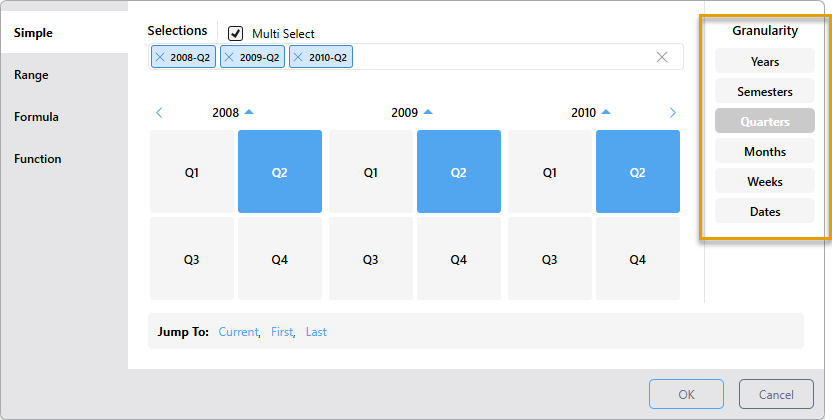
- Select Quarters and then select 2008 > Q2, 2009 > Q2, and 2010 > Q2 to filter the query by quarter 2 of 2008, 2009, and 2010. (The example above shows this selection.)
- Select Months and then select 2010 > Jul and Aug to filter the query by July and August, 2010.
- Select Weeks and then select 2009 and 1, 2, and 3 to filter the query by weeks 1, 2, and 3 of 2009.
- Select Dates and then select 2009 and January and then 3, 4, 17, 18, and 31 to filter the query by January 3, 4, 17, 18, and 31, 2009.
Calendar Selection
The Date Calendar allows selections for dates that exist in the database only. Dates and periods for which there is no data are grayed out. To make a selection from the calendar, start by selecting the required level of granularity, then select the required date or time period.
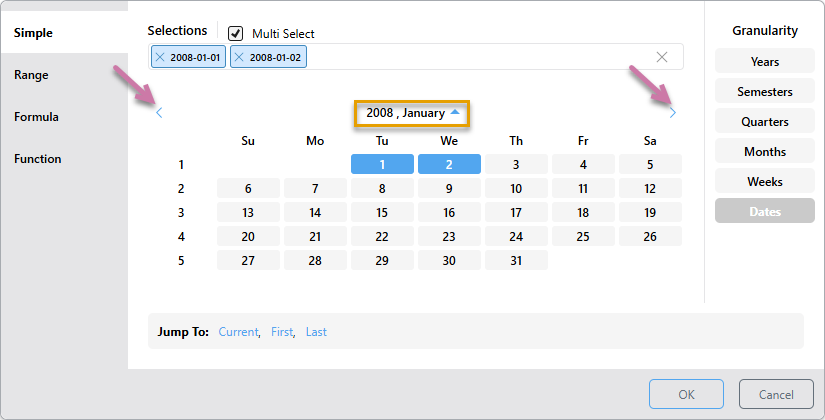
To assist in making a selection, use the back and forward arrows to move to the next or previous period, and use the up and down buttons to jump to a different month or year.
Back and Forward Buttons
Use the back and forward buttons to navigate through the calendar at the current level of granularity. For example, at the Dates level the calendar displays dates by month (orange highlight below), click the forward arrow to go to the next month, or the back arrow to go to the previous month (purple arrows). Likewise, at the week level, click forward to go to the next year, or back to go to the previous year.
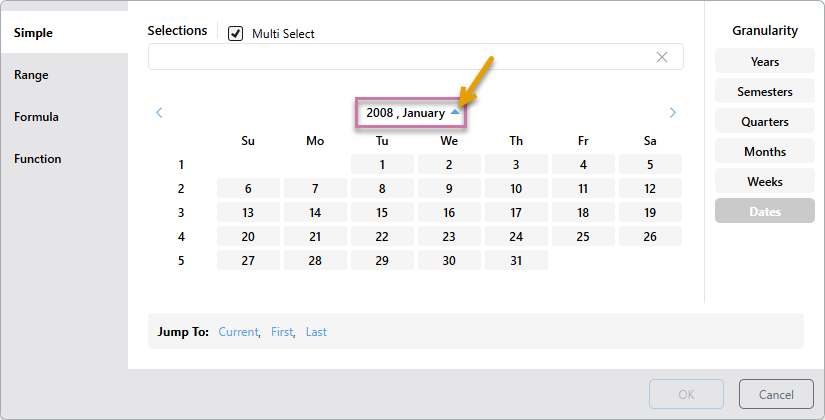
Up and Down Buttons
Use the up and down buttons (orange highlight above) to jump to a different month or year for the current level of granularity. Up buttons indicate that you can go up a level, while down arrows indicate that you can go down a level, without making a filter selection.
Examples
To follow these examples, use the Sample Demo data model.
With Dates selected as your Granularity, you will see the currently selected Year and Month above the calendar (purple highlight below):
Click the Arrow above (orange arrow) to show the Months in the currently selected year that include data:
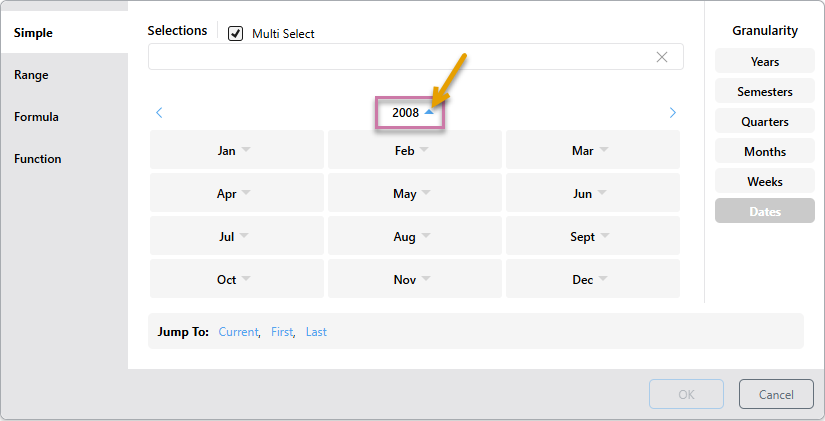
Note: Each month in the preceding panel displays its own arrow. This indicates that if you click on a month, you will go to the date level.
Click the Arrow above (orange arrow) to see the years, and then select 2010:
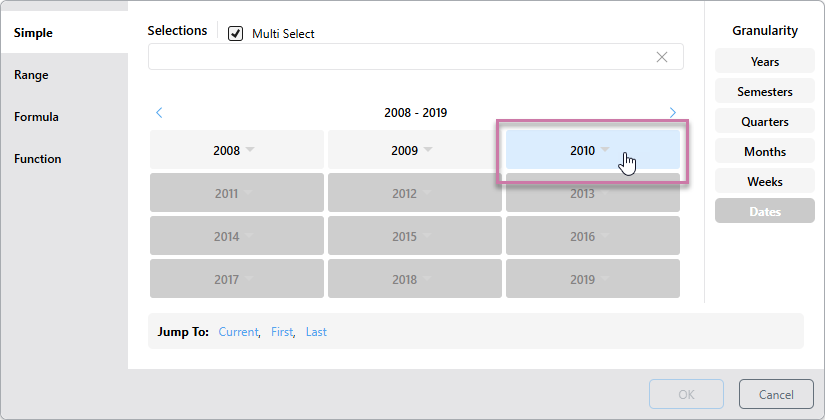
You will now see the months in 2010. Select September:
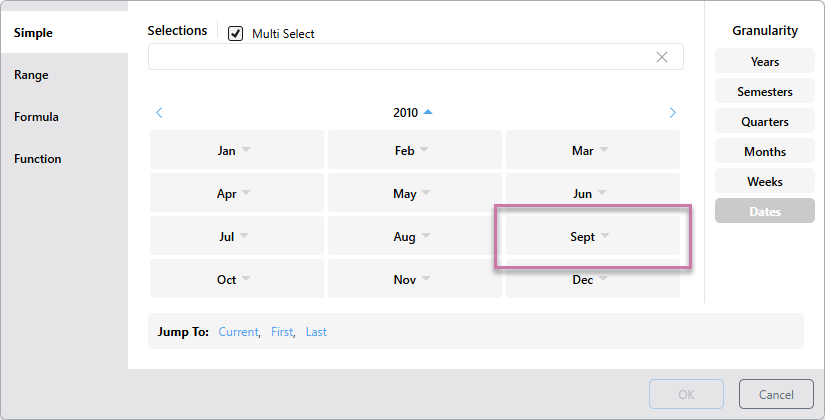
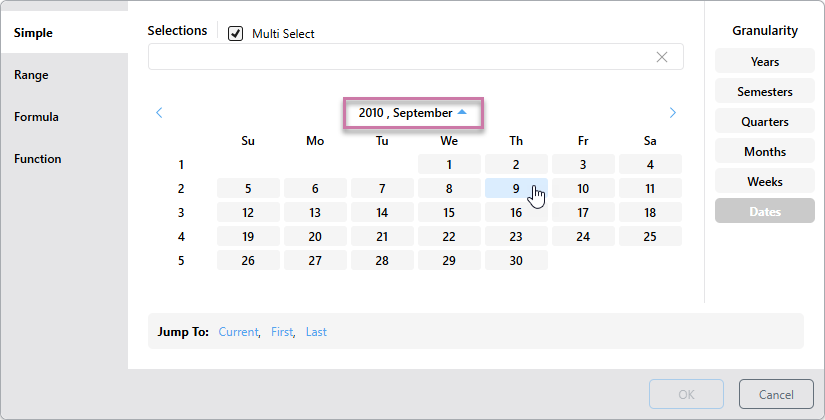
You will now see the dates for 2010, September and you can make a filter selection of dates:
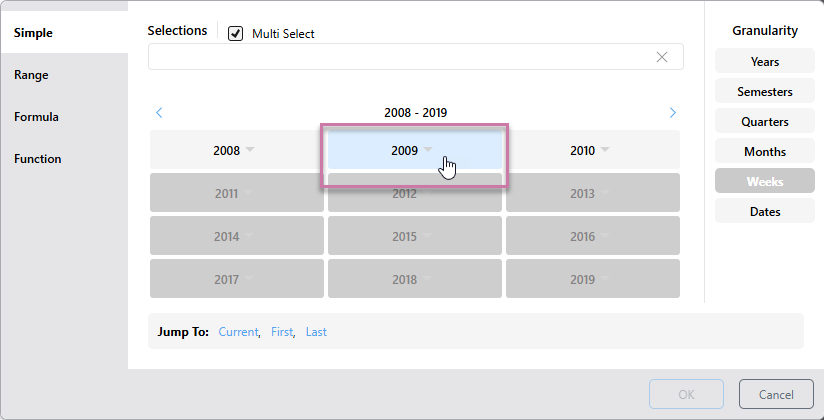
From the weeks, months, quarters, and semesters levels, the Arrow button will show you the years (purple highlight below). Set the granularity to Weeks and click the Up button.
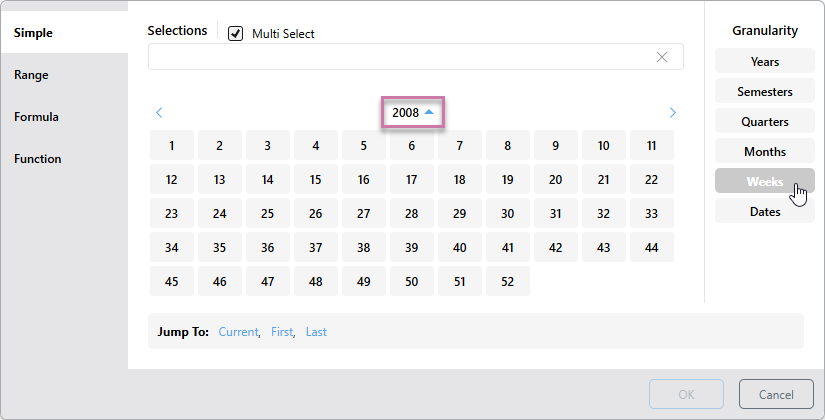
You will see the list of years, accompanied by a down arrow. Select 2009:
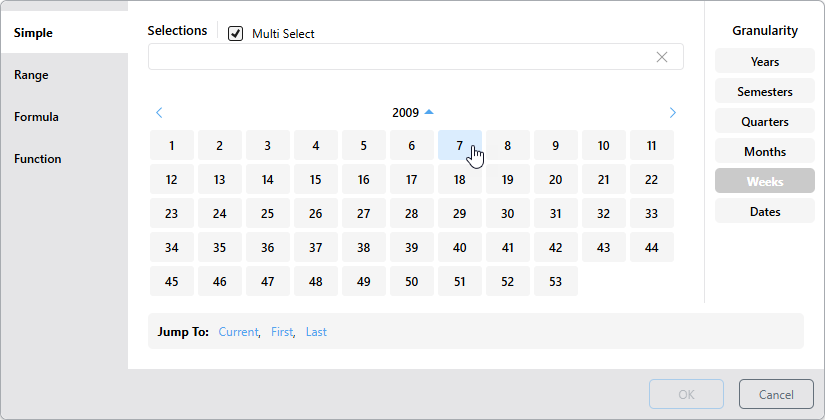
You will now see all the weeks in 2009, and can select one or more weeks:
Multi Select
The multi select option is supported by the Simple Date Calendar, allowing you to select multiple date-time elements. You can select multiple elements from different granularity levels.
Multi Select is enabled by default; to disable it, clear the Multi Select checkbox (green arrow below):
![]()
Tip: To remove selections from the panel, either click their X icons individually (orange arrow above), or click X at the end of the Selections field to remove all (blue arrow).
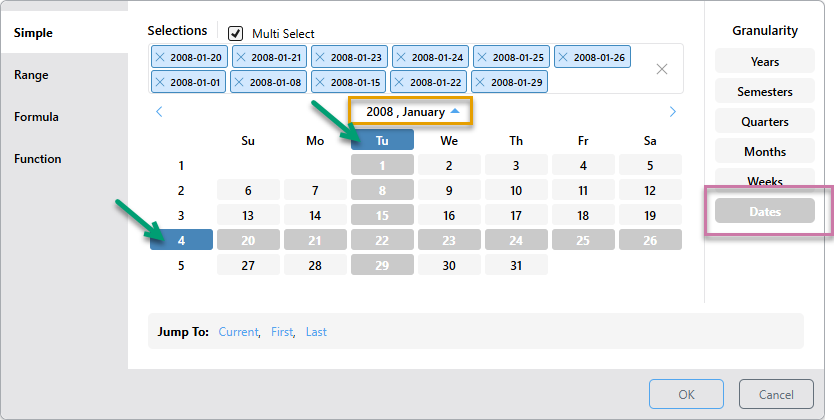
In this example, all Tuesdays in September 2010 were selected, along with the entire 4th week of the same month:
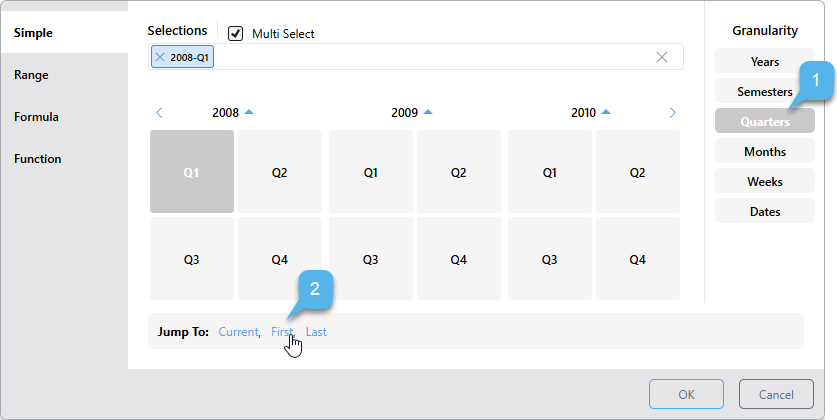
In this example, Q2 was selected from 2008, 2009, and 2010:
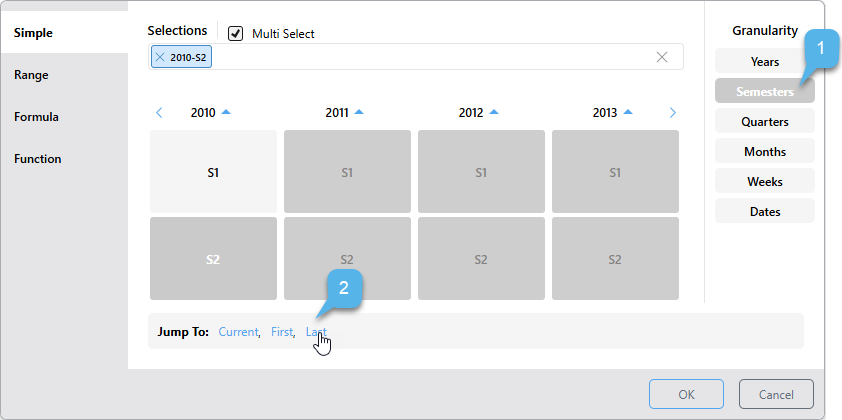
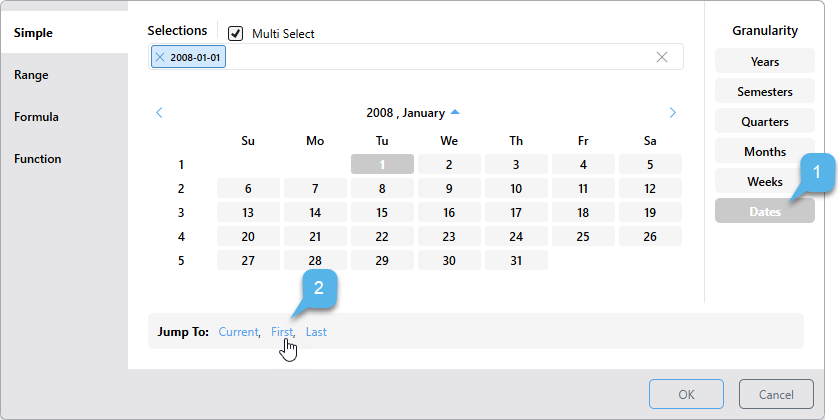
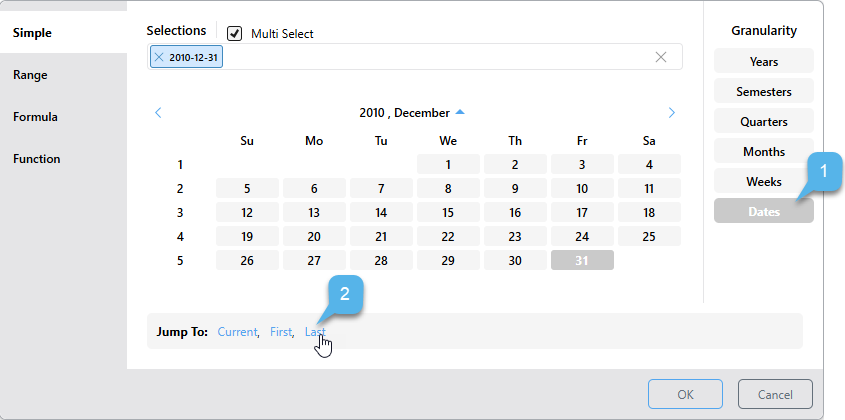
Quick Selection
The quick selection options provide a shortcut selection for filtering by the current, first, or last date-time period at the current level of granularity.
To make a quick selection:
- Start by choosing the granularity level as usual.
- Then, instead of making a selection from the calendar, choose a Quick Selection from the options below.
- Current: Depending on the given level of granularity, selects today's date (if it exists in the system) or the current year, semester, quarter, month, or week. If the current date-time period doesn't exist in the system, the last date-time period will be selected instead.
- First: Selects the first date-time period in the system according to the selected level of granularity. If the granularity is set to Dates, the first date in the system will be selected; if the granularity is set to months, the first month in the system will be selected; and so on.
- Last: Selects the last date-time period in the system according to the selected level of granularity. If the granularity is set to Dates, the last date in the system is selected. If the granularity is set to years, the last year in the system is selected.
Here, the first date in the system was selected:
Here, the granularity is set to Weeks, so the first week was selected:

Here, the last date in the system was selected:
Now the last semester in the system was selected: